
Rocketbrew & Salesforce Connection Overview
This guide provides an overview of integrating Rocketbrew with Salesforce CRM. Please ensure you follow these steps carefully to optimize the integration and maximize functionality.
Setup Prerequisites
Requirements for Integration
Admin Permissions: The integration must be performed by a Salesforce Admin or a seat with the following permissions:
Read/Create/Edit on the Standard Objects:
- Accounts
- Contacts
- Leads
- Opportunities
For Administrative Permissions:
- API Enabled
- View Setup and Configuration (used to see API quota limits)
- Use CRM Analytics
- Modify Metadata Through Metadata API Functions
- Update Email Messages
- Edit Tasks
Field Mapping
Follow these steps for proper mapping:
1. Navigate to Object Manager in Salesforce
2. Search for Lead
3. Go to Fields and Relationships
4. Use the API Name for mapping:
- If your organization has a field for LinkedIn profiles, use the API name (LinkedIn_URL__c)
- If the field does not exist, Rocketbrew will sync using a custom field
Activity Tracking
Rocketbrew activities will appear as follows in Salesforce:
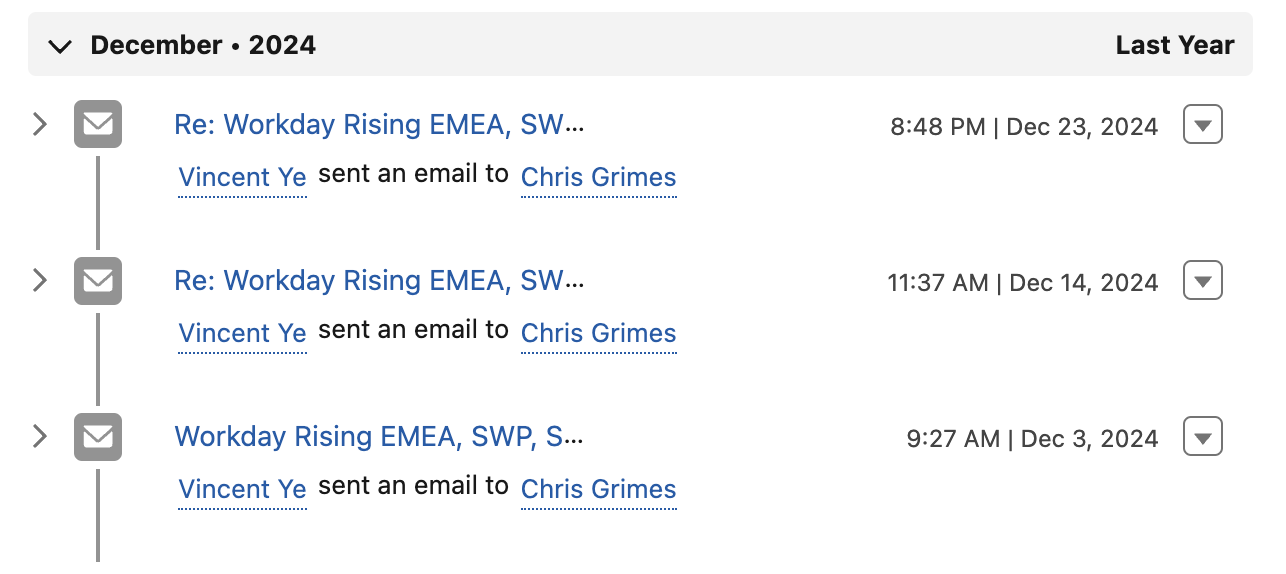
- LinkedIn Activity: Displayed with the subject line "LinkedIn Incoming."
- Lead Status: Default status for leads is set to Working - Contacted.
- Custom Fields: Salesforce’s default leads table does not display Rocketbrew fields automatically. You can customize the view to include up the 7 custom Rocketbrew fields.


API Usage and Limits
Reading Data: Each check for leads in Salesforce requires 1 API call.
Writing New Leads:
- 8 API calls to ensure required properties exist.
- 1 API call to determine the Salesforce ID of the contact.
- 1 API call to check if the lead already exists.
- 1 API call to create or update the lead.
- 1 additional API call per message associated with the lead.
- Total: Approximately 12 API calls per new lead.
Writing Existing Leads: The process mirrors that of new leads, with the same number of API calls per response.
Exclusion Rules:
- Leads with a LastActivityDate within the past 90 days.
- Opportunities and customers.
Setup Walkthrough
Step 1: Connecting to Salesforce
- Log into Rocketbrew. Click here to be directly taken to the Rocketbrew app.
- Head to "Manage Settings"
- Select "Lead Search Settings" or click here to be directly taken to this setting.
- Click on the blue "Connect" button under Salesforce.
- This will redirect you to the HubSpot login page where you can enter credentials and establish the connection.
- Enter your organization's LinkedIn API name in the Field Mapping box

*Note: Users with a sandbox account must first toggle the "Sandbox mode" option.
.png)

Step 2: Configuring Pull Records for a Campaign
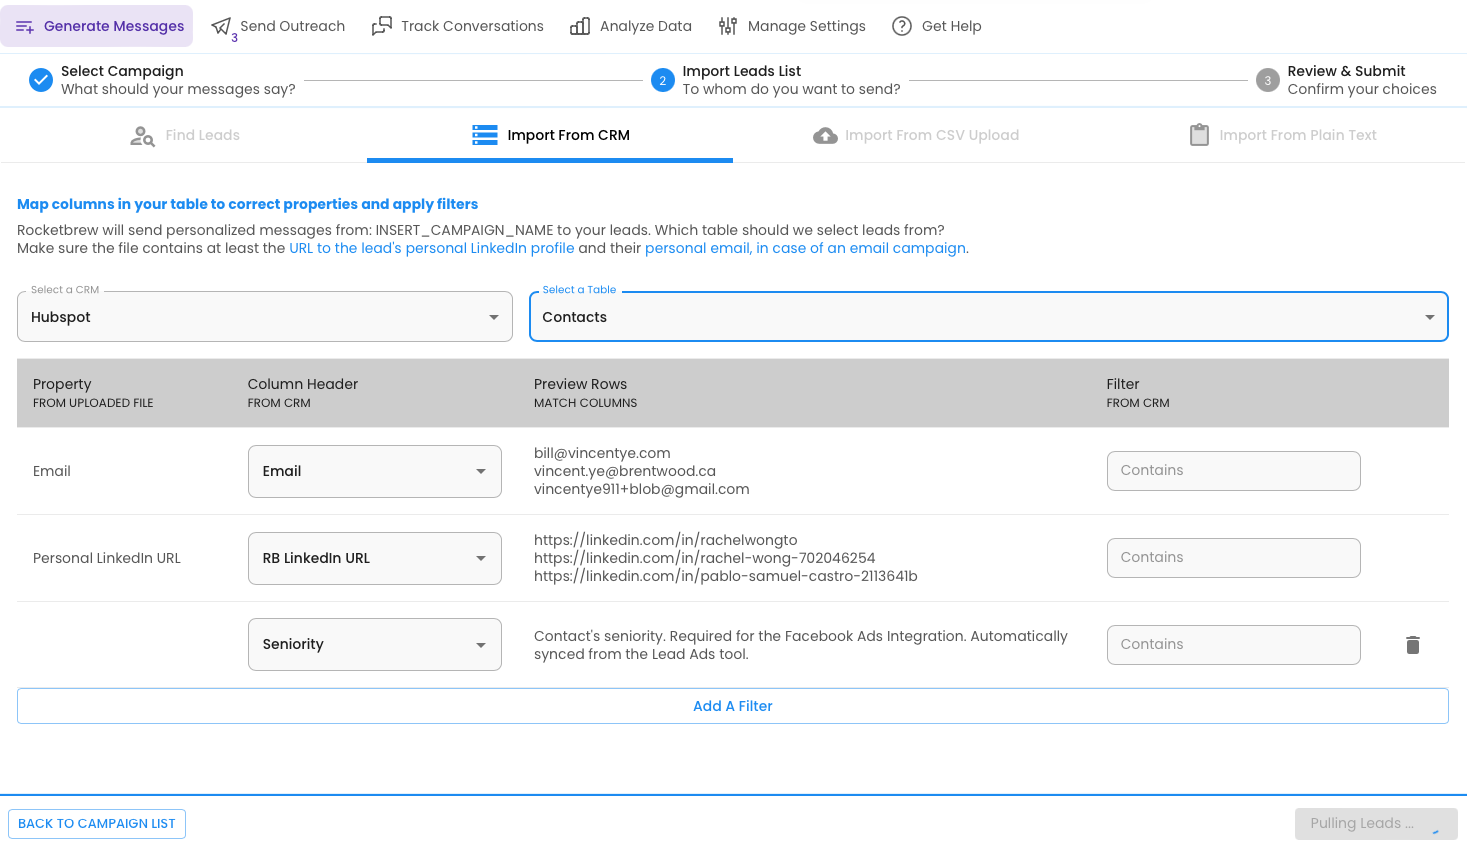
- Head to "Generate Messages" and create a new campaign or select an existing campaign.
- Import a leads list by selecting "Import from CRM"
- Select your integrated CRM.
- Select the table from which you want to pull lead records from. These are the leads that Rocketbrew will generate and send messages to.
- Using Rocketbrew’s flexible mapping system, map columns from your CRM objects to the corresponding Rocketbrew properties. Add a filter to continue mapping various properties and values to select from to pull the specific records from your CRM.
- Repeat as needed to add filters until you have selected the correct batch of leads you would like to send messages to.

Step 3: Configuring Push Records for a Campaign
Currently, Rocketbrew will automatically sync to your CRM and write back to the objects chosen by the user from which to pull data from (Step 2). Any updates to these chosen records will automatically be pushed to your CRM. Rocketbrew also automatically creates new properties, customized for Rocketbrew data only to make it simple for users to see Rocketbrew activity:
1. RB Status: The current lead status for a lead messaged from Rocketbrew.
Includes:
- Pending Connection: Outreach has been initiated (e.g., a LinkedIn request sent), but the lead has not yet accepted or responded.
- Connected: The lead has connected on LinkedIn, but has not yet responded.
- Awaiting Response: The lead has been contacted via email, but they have not yet responded.
- Response Ready: The lead has responded, and the Rocketbrew model is crafting a tailored reply based on their input or feedback.
- Conversing: The model has responded to the lead's response via email/LinkedIn and is waiting for their reply.
- Out of Office: The lead is out of office. The model will resume outreach when the lead is back in office
- Attention:
- Attention:Needs Information: The lead has responded and the model is searching for a response. If no response can be generated from the knowledge base, you will be notified to provide more information.
- Attention:Not Interested: The lead has conveyed that they are not interested but there may still be room to follow up.
- Attention:Initiating Call: The model is in the process of scheduling a meeting with the lead.
- Closed
- Closed Accepted: The lead has converted successfully (i.e., booked a meeting).
- Closed Unsubscribed: The lead has opted out of further communication, and no additional follow-ups will occur.
- Closed Rejected: The lead is no longer being pursued because they have explicitly declined interest.
2. RB Campaign Name: The specific campaign title that the lead is associated with. This campaign is created from Rocketbrew by the user.
3. RB Campaign Type: The specific campaign type that the lead is associated with, denoting which channel the campaign is targeting.
- Includes: LinkedIn, email
4. RB Sequence Stage: The current sequence stage of the message campaign for a lead messaged from Rocketbrew. Each sequence stage includes what the lead last received, whether a message was last sent, a message is queued to send soon, or a message has failed to send. Each sequence stage also includes a number denoting what message stage the sequence is on. This number is customized based on how many follow up messages the user is sending in the campaign. For example, Sent Followup #1 denotes that the first followup message has been sent. For example, Queued Send Followup #2 denotes that the second followup message is queued to send soon.
- Includes: Sent Followup, Queued Send Followup, Failed Send Followup
5. RB Last Activity: Timestamp marking the last activity from Rocketbrew.
6. RB Conversation: Formatted messages and conversation sent to and from Rocketbrew and the associated leads.
7: RB LinkedIn URL: Formatted LinkedIn URL found by Rocketbrew for the associated lead.
New leads will be written back to the CRM with the following fields:
1. Lead's Name
2. Lead's Title
3. Lead's Company
4. Lead's Contact Information: LinkedIn, email
5. Lead Status
For further support or detailed troubleshooting, please contact Rocketbrew’s support team.
FAQ
Yes, Rocketbrew can target dormant leads or contacts in Salesforce. This can be done in two ways:
- Using Salesforce fields as filters: For example, targeting leads with no activity in the last year and no current opportunities.
- Marking leads with a specific field: You can designate leads as "Rocketbrew Target" to include them in the prospecting process.
Net new leads: A lead whose email address is not already present in your Salesforce CRM.
Net new accounts: A lead whose domain (e.g., company website) is not already associated with an account in your Salesforce CRM.
Yes, Rocketbrew can exclude entire accounts. You can provide a list of company names and domains to exclude. The model will automatically exclude all leads and contacts associated with those domains (e.g., excluding joe@abc.com if abc.com is listed).
Yes, if activity data from other tools is written back to Salesforce, Rocketbrew will apply the same exclusion rules. For example, if Outreach tracks activity in Salesforce, Rocketbrew will exclude leads with recent Outreach activity.
If all data from other tools (e.g., Outreach) is written back to Salesforce, Rocketbrew will apply the same exclusion rules automatically.If data is not shared between tools, a common approach is to divide accounts between Rocketbrew and other tools based on size, product, or geography.
Rocketbrew can match leads to the correct account or create new accounts if necessary. If you have existing automation for lead conversion, Rocketbrew can trigger that process instead of recreating it.
Yes, Rocketbrew can automatically create custom tasks in Salesforce, such as SAL Tasks, when a call is scheduled. You can specify the required fields for these tasks.
Rocketbrew can personalize messages for both:
- Leads it finds independently.
- Dormant leads or contacts in Salesforce that meet the defined criteria.
Rocketbrew uses two inputs to find lookalike leads:
- Marketing’s Ideal Customer Profile (ICP): Hard requirements like title, employee count, and industry.
- Salesforce data: Examples of current customers to reinforce ICP requirements.
Rocketbrew prevents duplicates by:
- Defining net new leads as those whose email addresses are not in the CRM.
- Defining net new accounts as those whose domains are not in the CRM.
- Matching leads to the correct account or creating new accounts if necessary.
We'd love to help. You can contact us at our email - support@therocketbrew.com. We will get back to you in the next few hours.


